
So, you've written a book and you're ready to share it with the world. The great news is that getting it onto the biggest digital bookshelf on the planet is surprisingly straightforward. Publishing on Amazon is essentially a four-part dance: you'll create a free Kindle Direct Publishing (KDP) account, upload your polished manuscript and a killer cover, fill in your book's details, and pick a price.
That’s it. The whole process is free, and you can see your ebook live and for sale across the globe in as little as 72 hours.
Your Publishing Journey Starts Here
The dream of seeing your book for sale on Amazon is closer than you think. Amazon's Kindle Direct Publishing (KDP) platform has completely opened the doors for writers, making it possible for anyone to become a published author. This guide will walk you through it all, step-by-step, starting with the very first thing you need: your KDP account.
Think of your KDP account as your author command center. It’s more than just a login—it's where you’ll upload your book files, obsessively check your sales reports, and manage how you get paid. Nailing this initial setup is the key to a stress-free launch. For a bird's-eye view of the entire publishing landscape, our guide on how to become a published author is a great place to start.
To help you visualize the road ahead, here’s a quick-reference checklist of the entire process.
Your KDP Publishing Path from Start to Finish
| Stage | Key Action Items | What to Prepare |
|---|---|---|
| Foundation | Create your KDP account, complete tax and payment info. | Personal details, bank account information, tax ID (SSN/EIN). |
| Preparation | Format your manuscript, finalize your cover design. | A professionally edited manuscript file (DOCX, KPF, or EPUB), a high-resolution cover image. |
| Upload | Upload manuscript and cover files to your KDP Bookshelf. | Your two finalized files. |
| Metadata | Write your book description, choose keywords and categories. | A compelling book blurb, 7 backend keywords, 2-3 browse categories. |
| Pricing | Set your list price and select your royalty rate (35% or 70%). | Your pricing strategy, an understanding of royalty options. |
| Publish | Hit the publish button and wait for Amazon's review. | A bit of patience (usually 24-72 hours). |
| Post-Launch | Monitor sales, run promotions, and start marketing. | Your marketing plan, ideas for Amazon Ads or other promotions. |
This table maps out your journey, but it all begins with that first foundational step: setting up your account.
Setting Up Your Author Command Center
Getting your KDP account ready is a one-time task, but it requires a few critical pieces of information. Don't worry, it's pretty quick. You’ll need to have a few things handy:
- Personal and Business Details: You can publish as an individual using your own name or set up a business entity if you prefer.
- Payment Information: This is the fun part! You'll enter your bank account details so Amazon knows exactly where to send your royalties. They pay out monthly, so double-check that this is accurate.
- Tax Information: You’ll be guided through a short online tax interview. It’s a necessary step for legal and payment reasons and makes sure you're good to go from day one.
Once you’ve filled all that in, your KDP dashboard will come to life. I highly recommend taking a few minutes to explore. Click around the "Bookshelf," "Reports," and "Community" tabs. Getting a feel for the layout now will make you feel much more confident when it's time to actually upload your book.
Just to give you an idea of the scale we're talking about, Amazon KDP is the undisputed giant in the self-publishing world. It commands around 68% of the ebook market share in the United States. That incredible reach is precisely why it's the first stop for most independent authors. You can dig into more stats about author earnings on zonguru.com.
This first step isn't just admin work; it's you officially stepping into the role of a published author. With your account set up and ready to go, you're all set to bring your book to life.
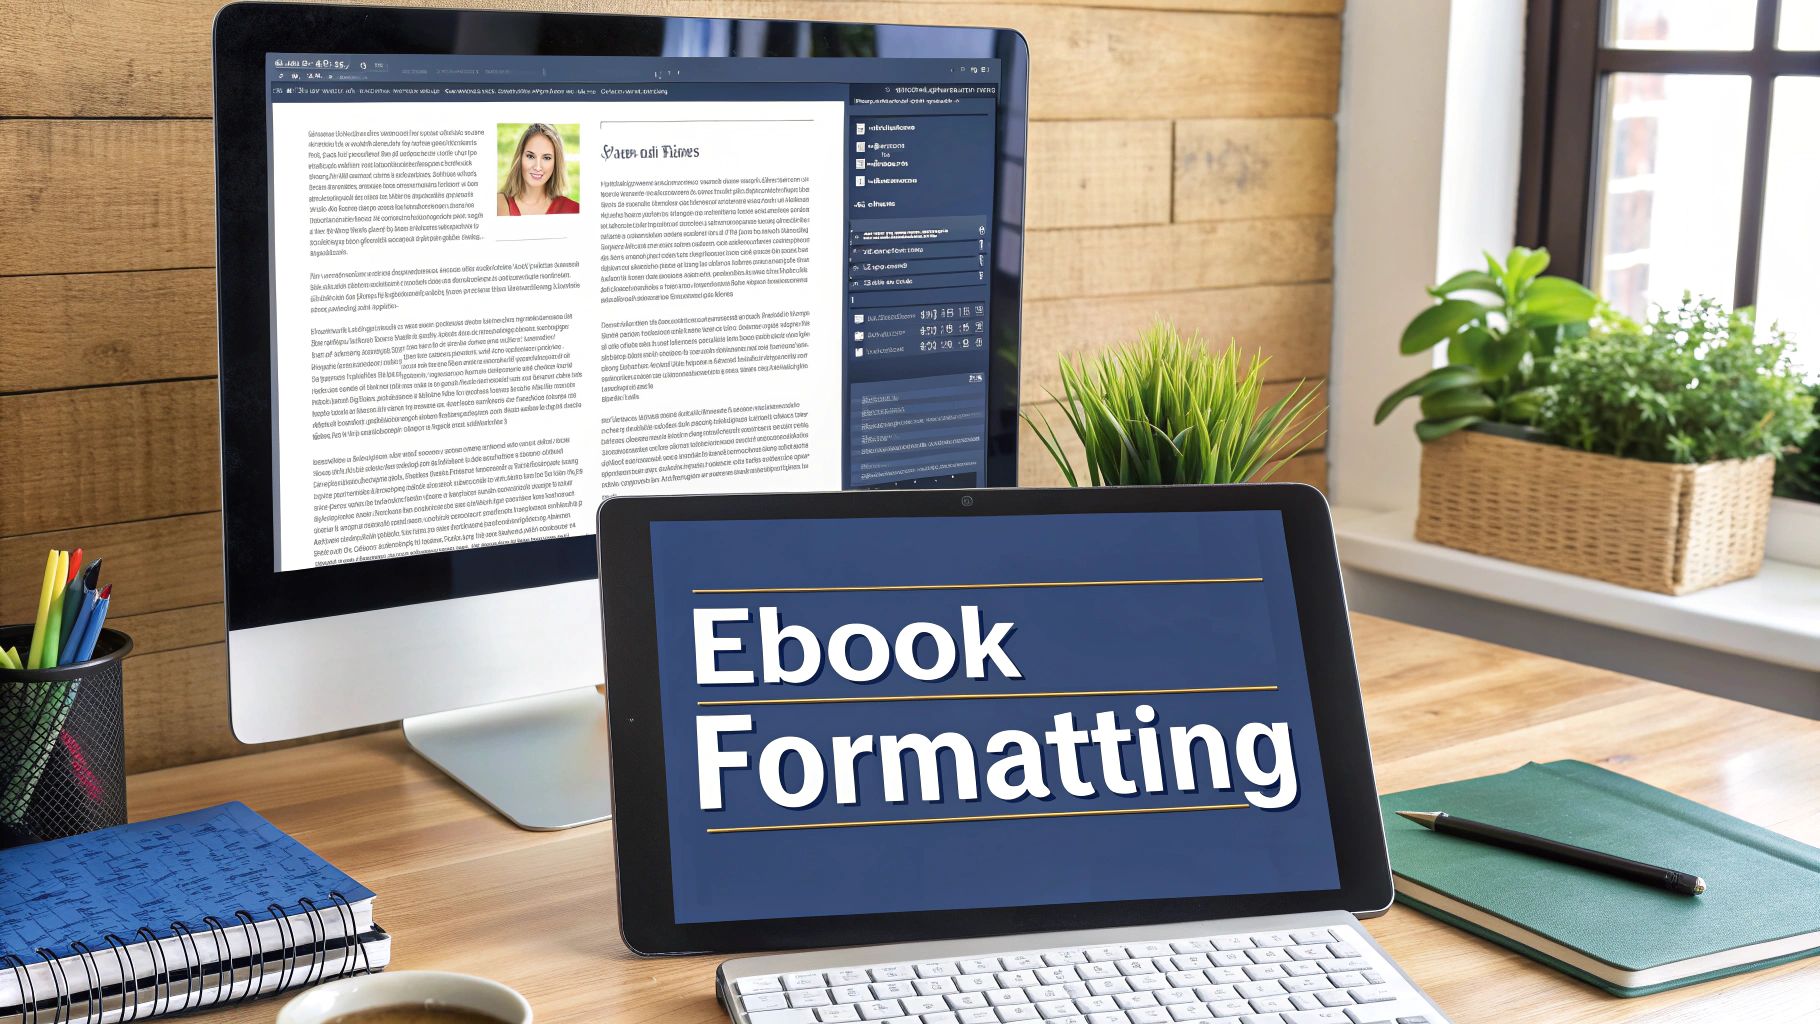
Getting Your Manuscript Ready for KDP
Your manuscript is the heart and soul of your book. But before it can wow readers on their Kindles, it needs to be properly dressed for the part. Transforming a simple document into a professional, easy-to-read ebook involves a bit of technical know-how.
Think of it this way: a clean, well-formatted interior ensures a smooth reading experience on any device. That directly translates to happy readers and better reviews. On the flip side, poor formatting—like wonky spacing, broken images, or a table of contents that doesn't work—is one of the fastest ways to scream "amateur." It frustrates readers, and that frustration often ends up in your reviews.
Getting the formatting right isn't just a suggestion; it's a non-negotiable step toward being seen as a professional author.
Choosing the Right File Format
When you go to upload your book, Amazon will give you a few file options. While they accept several, knowing the difference between the main three will save you a lot of headaches down the road.
- EPUB (.epub): This is the gold standard for ebooks. It's a flexible, universal format that works beautifully on nearly every e-reader, not just Kindle. If you ever plan to sell your book on other stores like Apple Books or Kobo, you'll need an EPUB file anyway. It gives you the most freedom.
- Kindle Package Format (.kpf): This is Amazon's own format, which you create using their free Kindle Create software. It’s built to work perfectly within the Kindle ecosystem and handles things like fancy typography and image layouts really well. The downside? It locks you into Amazon.
- Word Document (.docx): Yes, you can just upload your Word doc. I've seen many new authors try this, and it's easily the most unpredictable option. Amazon’s automatic conversion tool can sometimes spit out a file with bizarre formatting errors, and you have very little control over the final look.
For most authors, the best workflow is to start with a meticulously prepared Word document and then convert it to a clean EPUB. It’s the most reliable path. If you want to get into the nitty-gritty, our guide on how to format a book for Kindle breaks down the process step-by-step.
Essential Formatting Practices
Whether you’re using Microsoft Word, Google Docs, or a specialized program like Vellum, the core principles of good formatting are the same. Your goal is to create a clean, structured document before you ever think about converting or uploading it.
This screenshot from Amazon's own help section shows the formats they recommend.

As you can see, even Amazon prefers EPUB and KPF over a basic DOCX file because they offer more reliability and control.
Here are the absolute must-dos for your manuscript:
- Use Paragraph Styles: This is a big one. Instead of manually bolding and centering your chapter titles, use the built-in "Styles" in your word processor. Designate chapter titles as "Heading 1," subheadings as "Heading 2," and your main text as "Normal." This creates the underlying code KDP needs to build your ebook correctly.
- Insert Page Breaks: To start a new chapter, always insert a page break. Don't just hit the "Enter" key a bunch of times. A proper page break tells the e-reader to start the chapter on a fresh screen, which is critical for a clean layout.
- Build a Clickable Table of Contents: Every ebook needs a navigable Table of Contents (TOC). If you've used paragraph styles correctly for your chapter titles, most programs can generate a clickable TOC for you automatically in just a few clicks. It's a huge plus for reader experience.
- Embed Your Fonts: Using a special font for your chapter headings? Make sure it's embedded in the file. This ensures your book looks exactly as you intended on every single device, whether it’s a brand-new Kindle or an old smartphone.
A rookie mistake I see all the time is using the Tab key or spacebar to indent paragraphs. Please don't do this! Use the paragraph formatting settings in your word processor to apply a "first-line indent" automatically. This one simple change will fix a massive number of spacing problems when your book is converted.
Should You Use Kindle Create?
Amazon offers a free tool called Kindle Create to help authors turn their Word docs into polished KDP files. It's a pretty user-friendly option for adding professional themes, drop caps, and other nice touches.
So, is it right for you?
Kindle Create Pros & Cons
| Pros | Cons |
|---|---|
| Very easy to learn with a simple interface. | Locks your book into Amazon's KPF format. |
| Can create a polished look with pre-set themes. | Less creative control than pro software. |
| It’s 100% free. | Can be a bit buggy or have a learning curve. |
For a first-time author who only plans to publish on Amazon and wants a no-cost solution, Kindle Create is a solid choice. It gets the job done.
However, if you're building a long-term author career and want the option to sell your book everywhere, you’re better off creating a versatile EPUB file. It’s the more strategic move. Mastering your manuscript’s interior is a fundamental skill, and taking the time to learn it now will pay off for every book you publish.
Designing a Cover That Sells Your Book
It’s a brutal truth, but readers absolutely judge a book by its cover. On a crowded digital shelf like Amazon's, your ebook cover is the single most powerful piece of marketing you have. It can mean the difference between someone scrolling right past or stopping to click.
Think of it as the first handshake with a potential reader—a visual promise of the story or knowledge tucked inside. If the cover looks slapped together, people will assume the writing is too. Let’s walk through the best ways to get a cover that not only looks professional but actively moves copies of your book.
Choosing Your Design Path
You've really got three main routes to get your cover made. There’s no single "right" answer here; it all boils down to your budget, design skills, and how much control you want over the final product.
-
Hire a Professional Designer: Honestly, this is the best option for most authors. A pro who specializes in your genre already knows the visual shorthand that speaks to your readers. They understand the fonts, color schemes, and imagery that scream "epic fantasy" versus "cozy mystery." Great places to find these pros are marketplaces like Reedsy or 99designs.
-
Buy a Pre-Made Cover: A fantastic middle-ground. Designers often create high-quality covers that they sell "off the rack" at a much lower price than a custom job. The key is that they're only sold once, so your book still gets a unique look. You don't get a say in the initial concept, but you can snag a professional cover for a fraction of the cost.
-
Design It Yourself (The DIY Route): This is the cheapest path, but it's also the riskiest. Unless you have a good eye for design, a DIY cover can cripple your sales before you even start.
Essential Tips for a DIY Book Cover
If you're set on designing your own cover, you need to be careful and stick to the fundamentals. Tools like Canva have made graphic design more accessible, but a great cover is so much more than just dropping a stock photo into a template.
New tools can also give you a creative edge. For example, you can learn how to create stunning digital product images using AI generators to produce some truly unique visuals.
No matter the tools you use, focus on these core elements:
-
Source High-Quality Imagery: Never, ever just grab an image from a Google search—that's a copyright nightmare waiting to happen. Use reputable stock photo sites like Adobe Stock or Depositphotos.
-
Master Typography: Your title has to be crystal clear, even when it’s a tiny thumbnail on a phone screen. Pick a font that fits the genre and is dead simple to read. Get the spacing and alignment just right.
-
Understand Color Theory: Colors trigger emotions. A little research into the common color palettes for your genre will go a long way in sending the right signals to potential readers.
Your cover must look like it belongs on the same shelf as the bestsellers in your category. Anything less signals to readers that your book might not be up to par.
For a deeper dive, check out our guide on https://barkerbooks.com/book-cover-design-tips/ to steer clear of the most common mistakes.
Meeting KDP Technical Specifications
Okay, this part is crucial. No matter who designs your cover, it has to meet Amazon's specific technical requirements. If it doesn't, KDP will either reject it or it will look blurry and pixelated, which can delay your launch.
Here are the specs you absolutely need to hit:
- File Format: Stick to JPEG or TIFF.
- Dimensions: The sweet spot is 2,560 x 1,600 pixels. This 1.6:1 aspect ratio looks sharp and fits perfectly on all Kindle devices.
- Resolution: While the minimum is 72 DPI (Dots Per Inch), always aim for 300 DPI. It makes a huge difference in clarity.
- Color Profile: Make sure your file is saved in RGB color mode, which is the standard for all digital screens.
Getting your cover right is one of the most important investments you'll make in your book's success. Don't cut corners here.
Mastering Your KDP Metadata for Discoverability
Think of it this way: if your manuscript is the heart of your book and the cover is its face, then the metadata is its voice. It’s what helps your book call out to the right readers across the noisy, crowded digital aisles of Amazon. This is the moment you transition from writer to publisher. Every field you fill out in your KDP Bookshelf is a breadcrumb leading readers straight to your work.
Don't let the term "metadata" intimidate you. It's simply the DNA of your book's online presence—your title, author name, book description, keywords, and categories. Getting these details right is absolutely fundamental to being discovered, and it's a non-negotiable part of publishing a successful ebook on Amazon.

Crafting a Book Description That Converts
Your book description is your sales pitch, plain and simple. A fantastic cover earns you the click, but a killer description is what seals the deal. You get 4,000 characters to play with, but the real challenge is hooking them in the first couple of sentences. Amazon only shows a short snippet before a reader has to click "Read more."
This isn't the place for a dry plot summary. You need to think like a movie trailer. Start with a powerful hook, introduce the core conflict or the central promise of the book, and end on a cliffhanger or a compelling question that makes them need to know what happens next. Give them the sizzle, not the whole steak.
To make your description pop, a little bit of basic HTML can make a huge difference. It’s not as scary as it sounds. Here are the only tags you really need to know:
<b>and</b>to make text bold.<i>and</i>to make text italic.<ul>and</ul>to start and end a bulleted list, with<li>before each list item.
Using these simple tools breaks up that daunting wall of text and lets you highlight the most compelling parts of your pitch. It just makes the whole thing easier—and more persuasive—to read.
The Art and Science of Keyword Selection
Amazon gives you seven keyword fields, and each one can hold up to 50 characters. This is probably the most powerful—and most misunderstood—part of the entire KDP setup. These aren't just tags; they're the actual search terms people are typing into Amazon to find a book just like yours. Your mission is to climb inside their heads.
The key is to think in phrases, not just single words. Almost nobody searches for "fantasy." They search for things like "epic fantasy with a cynical wizard" or "enemies to lovers dragon rider romance."
Here's my go-to process for digging up great keywords:
- Use Amazon's Search Bar. Head over to the Kindle Store and start typing phrases you think readers would use. Pay very close attention to the autofill suggestions. That's Amazon literally handing you a list of what people are actually searching for.
- Spy on the Competition. Find the top 5-10 bestselling books in your specific niche. Scour their titles, subtitles, and even their descriptions. You’ll quickly spot recurring phrases and themes that are clearly resonating with readers.
- Leverage Free Tools. You don’t have to shell out big bucks for fancy software. A quick search for a "free Amazon keyword tool" will give you more than enough options to brainstorm and gut-check your ideas.
Treat your seven keyword slots as one giant pool of searchable terms, not seven separate tags. The Amazon algorithm is smart enough to mix and match words across different fields. A pro strategy is to avoid repeating any words, packing each slot with unique, relevant phrases to maximize your reach.
For example, don't waste one slot on "military science fiction" and another on "space opera." Instead, try to combine them with other terms to cover more ground.
Choosing the Right BISAC Categories
Finally, you’ll be asked to pick your categories. These are the digital shelves where your book will live. Amazon allows you to select up to two BISAC categories (that's the industry standard system). Nailing this is crucial because it determines which "aisles" browsing readers will find you in.
The goal here is to be both relevant and strategic. Don't just pick a massive, hyper-competitive category like "Fiction > Romance." That's like dropping your book in the middle of Times Square. Drill down to get as specific as possible. A much better choice might be "Fiction > Romance > Paranormal > Shifters."
Here’s how to think about it:
- Be Accurate. Above all else, choose categories that honestly reflect your book's content. Mis-categorizing is a surefire way to get bad reviews from readers who feel misled.
- Find the Sweet Spot. You're looking for categories that get decent traffic but aren't so crowded that you'll be buried on page 90 within a day. A good tactic is to find a niche category where you have a real shot at hitting the bestseller list.
- Ask for More. Here's a tip many authors don't know: while the dashboard only lets you pick two, you can request up to 10 total categories by contacting KDP support after your book goes live. This is a huge advantage.
Getting your metadata right isn't a one-and-done task; it's something you'll likely tweak over time. But by launching with a magnetic description, laser-focused keywords, and smart categories, you're giving your ebook its best possible chance of being discovered. This isn't just data entry—it's your first major marketing push.
Pricing Strategies and Understanding Royalties
Getting your pricing right is one of the most critical decisions you'll make. It’s not just about picking a number; it’s about signaling your book's value, understanding reader psychology in your genre, and, most importantly, navigating Amazon's royalty system to maximize your earnings.
The price you set determines how much you make on every sale and can even affect your eligibility for Amazon's promotional programs. Let's dig into the details so you can price your ebook like a pro.
Decoding Amazon's Royalty Options
Amazon KDP has two main royalty plans for ebooks: 35% and 70%. Which one you get isn't just a simple choice—it's tied directly to how you price your book. Getting this wrong is a classic rookie mistake.
The most common pitfall I see new authors fall into is pricing their book outside the $2.99 to $9.99 window and then wondering why they're only earning a 35% royalty. That price range is your golden ticket to the higher 70% rate.
To qualify for the much more lucrative 70% royalty, your ebook has to check a few boxes:
- The Price Is Right: Your list price must fall between $2.99 and $9.99.
- Location, Location, Location: You need to sell it in territories where the 70% royalty is available (which, thankfully, includes major markets like the US, UK, Canada, and Australia).
- Original Work: The book can't be a public domain work.
If your book is priced below $2.99 or above $9.99, you’re automatically bumped down to the 35% royalty. Amazon built the system this way to guide authors toward a pricing sweet spot they've found encourages the most customer purchases.
The whole KDP process is designed to be accessible, as this image highlights.
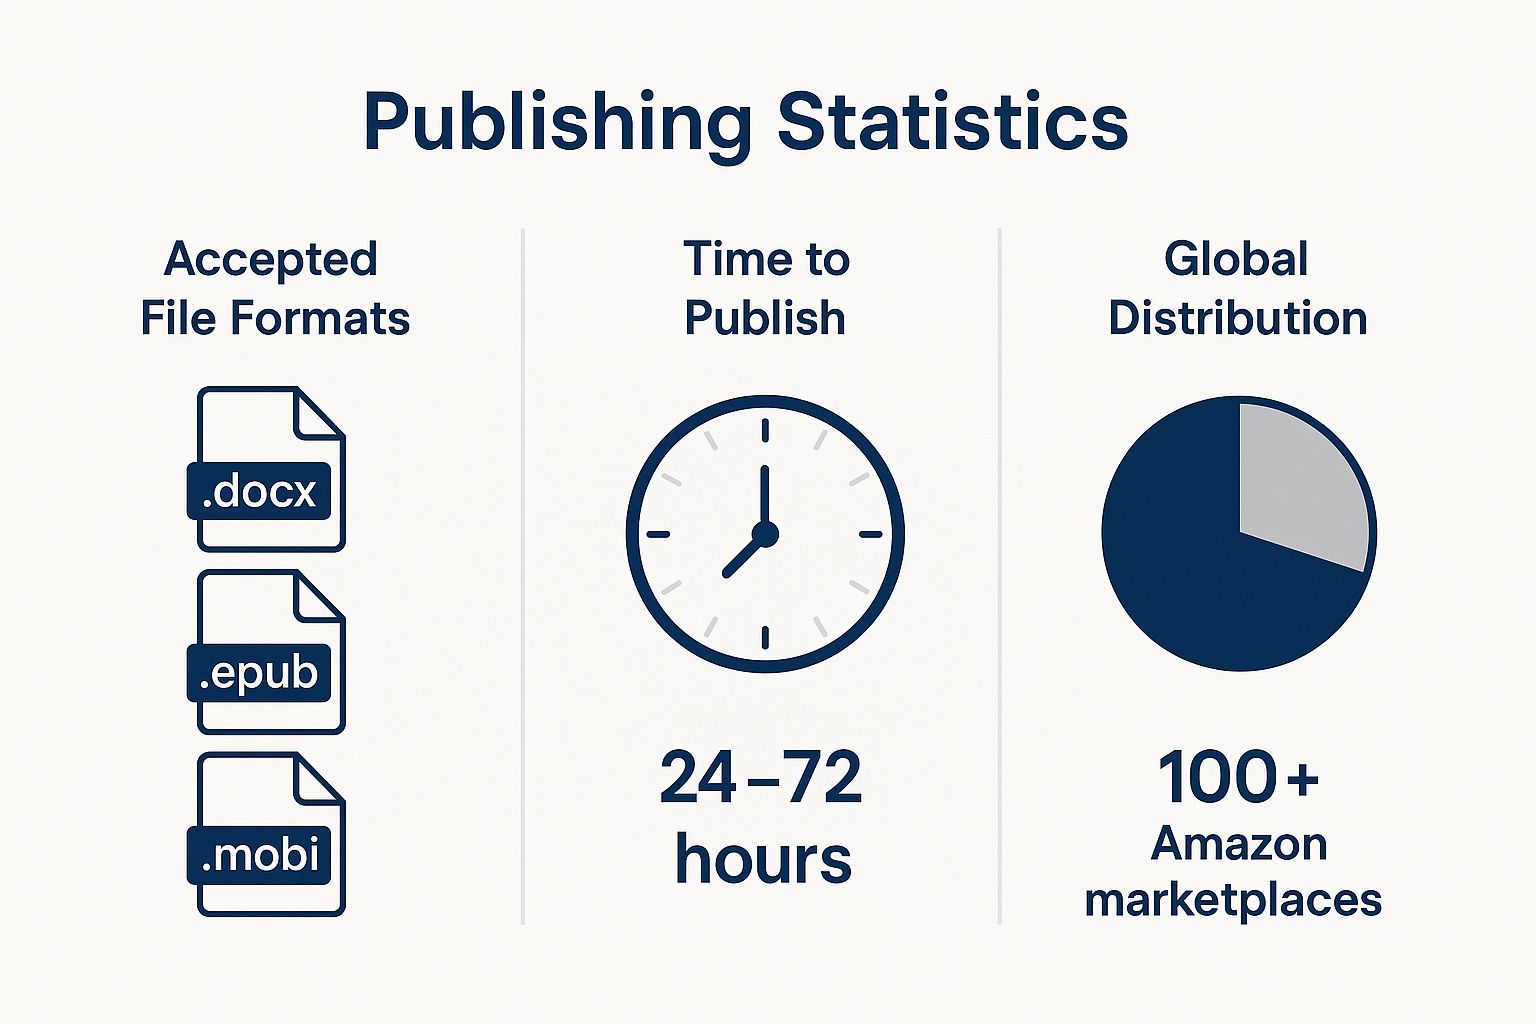
It really drives home the simple file formats, fast publishing timeline, and massive global reach you get as a KDP author.
Let's break down how the two royalty options stack up against each other.
Amazon KDP Royalty Options Compared
| Feature | 35% Royalty Option | 70% Royalty Option |
|---|---|---|
| List Price Requirement | Any price below $2.99 or above $9.99 | Must be between $2.99 and $9.99 |
| Delivery Costs | No delivery costs deducted from royalty | Delivery costs are deducted from your royalty |
| Territory Availability | Available in all territories | Only available in specific territories (most major markets) |
| Best For | Very short works (under $2.99), high-priced niche books (over $9.99), or books with large file sizes | Most full-length books aiming for mass-market appeal and maximum profit per sale |
While the 70% option is the goal for most authors, the 35% plan has its strategic uses, especially for novellas or highly specialized, expensive textbooks.
The KDP Select Decision: Exclusivity for Perks
After setting your price, you'll face another big decision: whether to enroll your ebook in KDP Select. This is an optional, 90-day program where you grant Amazon exclusive digital rights to your book. It’s a big commitment, but it unlocks some powerful promotional tools.
Enrolling in KDP Select automatically makes your book available in Kindle Unlimited (KU), Amazon's wildly popular subscription service. KU members can read your book for "free," and you get paid for every single page they read out of a monthly global fund. This fund is substantial—as of August 2025, it hit $60.1 million, with the payout hovering around $0.004282 per page. You can see a great breakdown of how KDP Global Fund Payouts work on writtenwordmedia.com.
Here’s the toolkit you get with KDP Select:
- Kindle Unlimited (KU) Enrollment: This gives you access to millions of the most voracious readers on the planet. For many authors, page-read income from KU becomes a very steady and significant part of their monthly earnings.
- Kindle Countdown Deals: You can run time-sensitive discounts on your book for a few days while still keeping your 70% royalty rate on every sale—a huge perk.
- Free Book Promotions: This is a classic launch tactic. You can offer your book for free for up to five days during each 90-day term to drive a massive number of downloads, climb the charts, and hopefully reel in some early reviews.
So, what's the catch? Exclusivity. While your book is in KDP Select, you can't sell the digital version anywhere else. Not on Apple Books, not on Kobo, not even on your own website. For authors wanting to go "wide" and build a presence on multiple platforms, this is a deal-breaker. But if you're just starting out, the promotional firepower of KDP Select is often the smartest way to build your initial audience on the world's biggest bookstore.
Your Final Launch Checklist and Beyond
You’ve made it. After all the work of uploading your files and tweaking every last detail, you're at the final checkpoint before your ebook goes live. This is your last chance to catch any mistakes and ensure a perfect reader experience. Don't rush this part—it's a mistake too many first-time authors make.
The single most important thing to do now is preview your ebook. Amazon gives you a fantastic online previewer that shows exactly how your book will appear on different devices, from a Kindle e-reader to a tablet or a phone. Go through it page by page. I mean every single page.
You’re hunting for any last-minute formatting gremlins. Specifically, look for things like:
- Weird paragraph spacing or indents.
- Images that look blurry or are out of alignment.
- Chapter breaks that don't look right.
- A Table of Contents with dead links.
For the most authentic test, download the preview file and load it onto your own Kindle or smartphone. This gives you the truest sense of what your readers will see and feel when they open your book.
Hitting the Publish Button
Once you’re completely satisfied that every page is perfect, it’s time for the moment you've been waiting for. Head back to your KDP Bookshelf and click that glorious "Publish Your Kindle Ebook" button. Your book is now officially in Amazon's hands for review.
This review process can take up to 72 hours, but in my experience, it’s often much quicker. Amazon is just making sure your book meets all their content and quality guidelines. You’ll get an email the moment it's live in the Kindle Store.
Hitting "publish" isn't the finish line; it's the starting line. All your focus now has to pivot from production to promotion. The most successful authors I know treat launch day as the beginning of their journey, not the end.
Life After Launch
Publishing isn't a "set it and forget it" game. That initial launch window is your golden opportunity to build momentum. Your first priority should be getting early reviews—they provide the social proof needed to convince new readers to take a chance on you.
This is also the time to start exploring Amazon Advertising to give your book a visibility boost right out of the gate. For a deeper dive, learning about advanced Amazon ASIN launch strategies can give you a real competitive edge.
And remember, the platform is always changing. For example, Amazon recently adjusted its print costs, slightly lowering them for standard color pages. It seems like a small thing, but for authors with longer print-on-demand books, it can make a real difference to your profit margins. Staying on top of these details is part of building a long-term author career. A strong launch combined with sustained marketing is what truly sets you up for success.
A Few Common Questions About KDP
When you're first figuring out how to get your ebook onto Amazon, a few questions always seem to pop up. Let's tackle the big ones so you can get back to the exciting part—publishing.
What’s This Going to Cost Me?
Here’s the good news: getting your ebook listed on Amazon KDP costs absolutely nothing. Zero. You can upload your manuscript and cover, set your price, and publish without paying a dime upfront.
Amazon makes its money by taking a cut of your royalties after a sale happens. So, any costs you run into are entirely up to you and usually happen before you even get to KDP. Think of things like:
- Hiring a professional editor to make your manuscript shine.
- Investing in a custom cover design that grabs a reader's eye.
- Budgeting for marketing once your book is live.
These are optional, but I'll be honest—a good editor and a professional cover are two of the best investments you can make for your book's success.
Do I Really Need an ISBN for a Kindle Ebook?
Nope, you don't. This is a huge plus for self-publishing through KDP.
Once you upload your book, Amazon will assign it an ASIN (Amazon Standard Identification Number) for free. This ASIN is your book’s unique ID across their entire global marketplace. It’s all you need if you're only selling on Amazon.
Now, if you're thinking bigger and want to sell your ebook on other retailers like Apple Books or Kobo, then you'll likely need to purchase your own ISBN. But for a Kindle-exclusive launch, Amazon has you covered.
A quick heads-up on timing: After you finally hit that 'Publish' button, the review process can take up to 72 hours. In my experience, it's usually much quicker—often live within 12 to 24 hours. You'll get an email from Amazon the moment it's available in the Kindle Store.
Ready to turn your manuscript into a professionally published book available to readers worldwide? BarkerBooks has helped over 7,500 authors achieve their publishing dreams. Let our team of experts handle everything from editing and cover design to global distribution and marketing. Visit us at https://barkerbooks.com to start your journey today.