
From Blank Page to Bestseller: The Blueprint Behind Every Great Book
Every great book, whether a sprawling fantasy epic or a concise business guide, begins not with a perfect first sentence, but with a solid plan. This plan is the book outline, a structural blueprint that transforms a brilliant idea into a coherent, compelling manuscript. Without this roadmap, even the most promising concepts can lose their way, resulting in narrative gaps, pacing issues, and a disjointed final product for the reader. A well-crafted outline is the single most effective tool for ensuring your story flows logically and your arguments build persuasively from start to finish.
This article moves beyond theory to provide concrete, actionable examples of book outlines that work. We will dissect several proven methods, from the classic three-act structure to the intricate Snowflake Method, showing you exactly how to apply them to your own fiction or non-fiction project. Each section provides a detailed breakdown, strategic analysis, and replicable takeaways you can implement immediately. For those looking to build a powerful author platform, understanding these structures is key. To truly captivate your readers and ensure your book leaves a lasting impact, understanding a robust brand storytelling framework can significantly enhance your narrative approach. By mastering the right example of a book outline, you will build the foundation needed to write with confidence and clarity.
1. The Three-Act Structure Outline
The Three-Act Structure is arguably the most timeless and widely used narrative framework in storytelling. Originating from Aristotle's Poetics and popularized for modern audiences by screenwriting gurus like Syd Field, it provides a robust and reliable blueprint for a compelling story. This structure organizes a narrative into three distinct parts: Act I (The Setup), Act II (The Confrontation), and Act III (The Resolution), creating a satisfying arc that engages readers from beginning to end.

This method’s strength lies in its ability to manage pacing and escalate tension naturally. Countless bestsellers, from The Hunger Games to Gone Girl, leverage this framework to build worlds, develop characters, and deliver impactful climaxes. It is a foundational example of a book outline because its principles of setup, rising action, and resolution are intuitive for both writers and readers.
Strategic Breakdown of the Three Acts
To effectively use this model, you must understand the function of each act and the key plot points that bridge them.
-
Act I: The Setup (Approximately 25% of the story): This act introduces the protagonist, their ordinary world, and the core conflict. It ends with the Inciting Incident, an event that disrupts the protagonist's life and forces them into action, and the First Plot Point, where the character makes a decision and fully commits to their journey.
-
Act II: The Confrontation (Approximately 50% of the story): This is the longest and most complex act. The protagonist faces escalating obstacles and challenges. Key moments include the Midpoint, a major turning point or revelation that raises the stakes, and the Second Plot Point (or All Is Lost moment), where the hero suffers a major defeat, seemingly making their goal impossible.
-
Act III: The Resolution (Approximately 25% of the story): The final act sees the protagonist rally for one last effort. It contains the Climax, the ultimate confrontation between the hero and the antagonistic force, followed by the Falling Action and Resolution, where the story's loose ends are tied up, and a new normal is established.
Actionable Takeaways for Implementation
When building your own three-act structure outline, focus on these tactical steps:
- Define Your Tentpoles: Before writing scenes, identify your five key "tentpole" moments: the Inciting Incident, First Plot Point, Midpoint, Second Plot Point, and Climax. These will anchor your entire narrative.
- Align Character Arc with Plot: Ensure your protagonist’s internal growth directly corresponds to the external plot beats. The Midpoint, for instance, should not only be a plot twist but also a moment of profound personal realization for the character.
- Use Subplots to Reinforce Themes: Develop subplots that mirror, contrast, or reinforce the central theme of your main story. In The Hunger Games, the Peeta-Katniss romance subplot amplifies the main theme of humanity versus survival.
2. The Hero's Journey Outline
The Hero's Journey is a powerful and archetypal narrative pattern based on Joseph Campbell's "monomyth" theory from his seminal work, The Hero with a Thousand Faces. It maps a hero's transformative adventure through a series of distinct stages, from their mundane life into a supernatural world of trials and tribulations, culminating in a triumphant return as a changed person. This structure taps into universal psychological patterns, making stories deeply resonant across cultures and time periods.

Its strength lies in its focus on character transformation, linking external plot events to the protagonist's internal growth. This framework is the backbone of timeless epics like The Lord of the Rings and modern sagas like Star Wars and The Matrix. It serves as an exceptional example of a book outline for fantasy, sci-fi, and adventure stories where a character's personal evolution is central to the narrative.
Strategic Breakdown of the Journey's Stages
While Campbell identified 17 stages, they are often condensed into a more manageable 12-step model, famously adapted by Christopher Vogler for modern storytelling. These stages are typically grouped into three overarching parts, similar to the three-act structure.
-
Part I: Departure (The Ordinary World): This section introduces the hero in their normal environment. It includes the Call to Adventure, the Refusal of the Call, and finally, Meeting the Mentor, who provides guidance or a crucial tool. The hero commits to the quest by Crossing the First Threshold, leaving their known world behind.
-
Part II: Initiation (The Special World): The hero enters a new, unfamiliar world and faces a series of challenges. This phase includes Tests, Allies, and Enemies, where the hero learns the rules of the new world. The Approach to the Inmost Cave leads to the central Ordeal, a major crisis or "death and rebirth" moment where the hero confronts their greatest fear. After surviving, they claim their Reward.
-
Part III: Return (The Road Back): The hero begins their journey home, often pursued by vengeful forces. The journey culminates in the Resurrection, a final, climactic test where the hero must use everything they've learned. Finally, they Return with the Elixir, bringing back something to heal or improve their ordinary world, demonstrating their transformation.
Actionable Takeaways for Implementation
When using the Hero's Journey for your own story, concentrate on these tactical steps:
- Focus on Internal Transformation: The external journey is a metaphor for the hero's internal growth. For every test or monster they face, consider what internal flaw or fear they are conquering. The final "Elixir" can be a physical object or a profound piece of wisdom.
- Adapt, Don't Adhere Rigidly: You do not need to include every single stage in a literal sense. Treat the stages as a flexible guide. Combine, reorder, or reinterpret them to best serve your specific story and prevent a predictable, paint-by-numbers plot.
- Develop Key Archetypes: The mentor, allies, and threshold guardians are not just plot devices; they are crucial for the hero's development. Give them distinct motivations and arcs that challenge and support the protagonist's journey. Delving into more tips for writing a book can help flesh out these vital supporting roles.
3. The Snowflake Method Outline
Created by software engineer and novelist Randy Ingermanson, the Snowflake Method applies a design principle from computer programming to creative writing. It champions starting small and systematically adding layers of detail. Like a fractal snowflake, your story grows from a single, core idea into an intricately structured narrative. This method is perfect for "planners" who prefer building a detailed road map before they start writing the actual prose, ensuring that plot, character arcs, and themes are cohesive from the ground up.
The method’s power is in its structured, iterative process. It prevents writers from getting overwhelmed by the scale of a novel by breaking it down into ten manageable steps. This highly organized approach has been adopted by authors across genres, especially in complex world-building-heavy fields like science fiction and fantasy. It stands as a premier example of a book outline because it offers a clear, step-by-step process for turning a simple concept into a fully realized story.
The infographic below visualizes the foundational steps of this iterative process, showing how a single idea blossoms into the core components of your narrative.
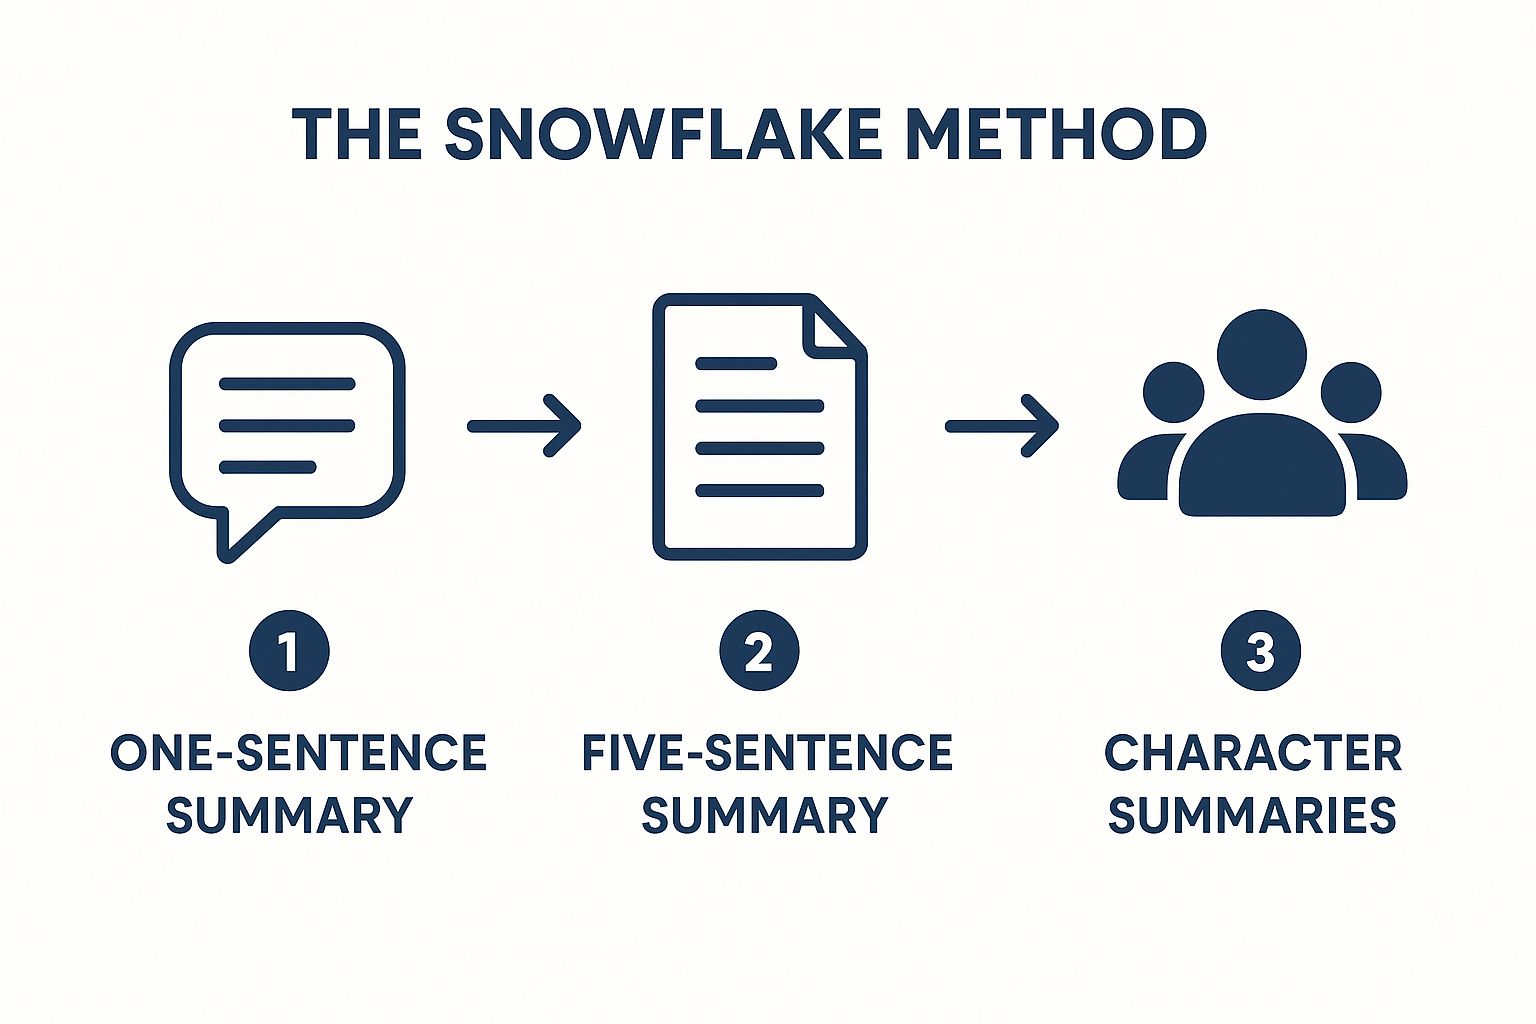
This process demonstrates how the method builds a strong foundation by expanding from a one-sentence summary to character-specific stories before you even write a single scene.
Strategic Breakdown of the Ten Steps
The Snowflake Method consists of ten distinct, sequential steps. While the full process is detailed, the initial stages are the most critical for establishing your story's foundation.
-
Steps 1-3: The Core Idea: You begin with a one-sentence summary of your story (Step 1). This is expanded into a five-sentence paragraph that mirrors the three-act structure: setup, three major disasters, and a conclusion (Step 2). Then, you write a one-page summary for each main character, detailing their goals, motivations, and conflicts (Step 3).
-
Steps 4-6: Expanding the Narrative: Each sentence from your five-sentence paragraph is expanded into a full paragraph, creating a one-page synopsis (Step 4). You then expand your character descriptions into full character charts detailing their backstories and arcs (Step 5). This leads to a four-page synopsis, providing a more detailed plot outline (Step 6).
-
Steps 7-10: Finalizing the Blueprint: With a solid story and character foundation, you create detailed character sheets for all characters (Step 7). You then create a scene list, often in a spreadsheet, mapping out every scene in the book (Step 8). You can then write a narrative description for each scene (Step 9) before finally writing the first draft (Step 10), using your scene list as a guide.
Actionable Takeaways for Implementation
To make the Snowflake Method work for you, focus on these tactical points:
- Don't Skip Steps: The method is designed to be sequential. Each step builds upon the last. Skipping a step, like fleshing out character motivations, will create weaknesses in your plot later on.
- Embrace Iteration: Allow yourself to go back and revise earlier steps as you gain new insights. If developing your scene list (Step 8) reveals a plot hole, go back and adjust your synopsis (Step 6). The process is flexible.
- Use Characters to Drive the Plot: The emphasis on character summaries early on is intentional. Use your characters' goals, motivations, and internal conflicts to generate the "disasters" and turning points of your plot, making the story feel organic and character-driven.
4. The Chapter-by-Chapter Synopsis Outline
For authors who thrive on detail and precision, the Chapter-by-Chapter Synopsis Outline is the ultimate roadmap. This method involves breaking down the entire narrative into individual chapters and writing a one-to-three-paragraph synopsis for each one. This approach provides a granular, scene-by-scene guide that ensures every part of the story serves a purpose, making it an invaluable tool for managing complex plots, multiple points of view, or intricate timelines.
This meticulous framework is a favorite among commercial fiction powerhouses like James Patterson, who uses it to coordinate with co-authors, and writers of epic series like George R.R. Martin's A Song of Ice and Fire, where tracking numerous character arcs is essential. Its strength lies in its clarity and foresight, allowing the writer to solve pacing issues, plug plot holes, and perfect character development before drafting a single page. This makes it a powerful example of a book outline for those who prefer planning over discovery writing. For those who prefer a more granular approach, you might find valuable insights on mastering your novel chapter outline.
Strategic Breakdown of the Chapter Synopsis
To build a useful chapter-by-chapter outline, you must detail not just what happens, but why it matters. Each synopsis should be a miniature story in itself.
-
Plot Progression: Clearly state the key events that occur in the chapter. What is the primary goal, what obstacles arise, and how is the conflict advanced or complicated? Each chapter should move the main plot forward.
-
Character Arc and Emotional Beats: Document the protagonist’s emotional state at the beginning and end of the chapter. What do they learn, how do they change, and what key decisions do they make? Tracking this ensures their growth feels earned and realistic.
-
Tension and Pacing: Each chapter summary should identify the central point of tension. End each synopsis by noting the hook or cliffhanger that will compel the reader to turn the page, effectively managing the story's overall pacing.
Actionable Takeaways for Implementation
When crafting your own detailed chapter synopsis, focus on these tactical steps:
- Start with Major Plot Points: Before breaking it down by chapter, have your major structural beats (like the Inciting Incident, Midpoint, and Climax) identified. Assign these beats to specific chapters first to create your narrative skeleton.
- Assign a Core Purpose: For each chapter, write a single sentence defining its primary purpose. For example, "Chapter 12: Introduce the red herring and increase the detective's self-doubt." This keeps your writing focused.
- Use a Consistent Template: Create a simple template for each chapter synopsis that includes fields for POV character, setting, plot events, character development, and the end-of-chapter hook. This ensures consistency and is a key part of an effective book writing process.
5. The Mind Map Outline
The Mind Map Outline offers a dynamic and non-linear alternative to traditional, sequential outlining methods. Popularized by creativity proponents like Tony Buzan, this visual approach uses a central idea as a starting point, from which concepts, characters, plot points, and themes branch out like the limbs of a tree. This method excels at uncovering hidden connections and fostering organic story development, making it ideal for writers who feel constrained by rigid structures.

Its primary strength is its flexibility, allowing for free-form association and exploration. This makes it an exceptional tool for complex projects like fantasy world-building, intricate mystery novels, or literary fiction where thematic depth is paramount. The Mind Map is a powerful example of a book outline because it prioritizes discovery over dictation, helping writers understand the interconnected web of their story before committing to a linear path. For those who prefer a visual approach to structuring their thoughts, explore how you can master brainstorming and mind mapping techniques.
Strategic Breakdown of the Mind Map
To leverage this model, you must embrace its fluid nature while still guiding it toward a coherent narrative structure. The goal is to explore, connect, and then organize.
-
Central Concept: Begin with a single word or image in the center of your page representing your story's core idea, theme, or protagonist. This is your anchor from which all other elements will grow. For a mystery, this might be "The Victim's Secret."
-
Primary Branches: Create main branches extending from the center for major story components like "Plot," "Characters," "Themes," and "Setting." You might also create branches for specific acts or key story sequences.
-
Secondary and Tertiary Branches: From your primary branches, add smaller, more detailed sub-branches. The "Characters" branch might sprout nodes for "Protagonist," "Antagonist," and "Supporting Cast," which in turn branch into "Motivations," "Backstory," and "Relationships." This layered approach builds complexity naturally.
Actionable Takeaways for Implementation
When creating your own mind map outline, focus on these tactical steps:
- Use Visual Cues: Assign different colors or symbols to different categories. For example, use red for plot points, blue for character arcs, and green for thematic elements. This visual coding helps you instantly see the relationships and balance between different parts of your story.
- Start Broad, Then Go Deep: Don't censor yourself in the initial stages. Let ideas flow freely, creating as many branches as possible. Once the map is populated, you can begin to prune, refine, and identify the strongest narrative threads to form a cohesive plot.
- Convert to a Linear Outline (Optional): After your mind map has revealed the core structure and connections of your story, you can translate the key points into a more traditional linear outline (like a chapter list or three-act structure) to guide the actual writing process. Discover more about this and other writing tools for authors on barkerbooks.com.
6. The Seven-Point Story Structure Outline
The Seven-Point Story Structure, developed and popularized by author Dan Wells, is a plot-first outlining method designed for creating tight, satisfying narrative arcs. Its core principle is to begin with the end in mind. By defining the resolution first, writers can reverse-engineer the plot, ensuring every major story beat logically and purposefully builds toward a cohesive climax. This makes it a powerful and efficient example of a book outline for those who want to avoid meandering middles and weak endings.
This structure's genius lies in its symmetry. It creates a mirrored arc where the events of the first half are reflected and resolved in the second half, leading to a deeply resonant reader experience. It’s particularly effective in genres like thriller, mystery, and science fiction, where plot twists and revelations are paramount. Prominent authors like Brandon Sanderson also champion and teach this method, highlighting its utility for crafting complex fantasy narratives.
Strategic Breakdown of the Seven Points
To implement this model, you must understand how the seven points connect to form a complete character and plot journey. The structure is built around three core milestones: the Hook, the Midpoint, and the Resolution.
- 1. The Hook: This introduces the protagonist’s starting point. It establishes their world, their initial state, and their underlying flaw or problem before the main conflict begins.
- 2. Plot Point 1: The event that pushes the protagonist into the main story. They are no longer passive; they must now react and engage with the central conflict.
- 3. Pinch Point 1: This is where the antagonistic force is introduced or its pressure is first truly felt. It applies pressure and showcases what's at stake.
- 4. The Midpoint: The character shifts from reaction to action. They have gained new information or skills and now decide to take the fight directly to the antagonist.
- 5. Pinch Point 2: More pressure is applied. The antagonist demonstrates their power again, often in a way that exploits the hero's weaknesses and raises the stakes even higher.
- 6. Plot Point 2: The "All Is Lost" moment. Here, the hero gets what they thought they wanted, but it's revealed to be a disaster, or they discover the key piece of information needed to win, but are at their lowest point.
- 7. The Resolution: The final confrontation. The protagonist, now changed and empowered by their journey, faces the conflict head-on and achieves a true, earned victory. This is the mirror opposite of the Hook.
Actionable Takeaways for Implementation
When applying the Seven-Point Story Structure to your book, concentrate on these tactical steps:
- Start with the End: Before you do anything else, define your Resolution. What is the final state of your character and their world? Knowing this provides a clear target for every other plot point.
- Create Mirrored Plot Points: Build your outline by pairing the points. Your Hook (the character's problem) should be the mirror opposite of your Resolution (the solution). Plot Point 1 should push the character into a situation that is resolved by their discovery at Plot Point 2.
- Make Your Pinches Painful: The Pinch Points exist to remind the reader of the central conflict and the antagonist's threat. Use these moments to reveal the villain's power, methods, or motives, directly challenging the protagonist and forcing them to adapt.
6 Key Book Outline Methods Compared
| Outline Method | Implementation Complexity 🔄 | Resource Requirements ⚡ | Expected Outcomes 📊 | Ideal Use Cases 💡 | Key Advantages ⭐ |
|---|---|---|---|---|---|
| The Three-Act Structure Outline | Moderate – clear three-part division | Low – simple structure, few tools needed | Well-paced, engaging story progression | Commercial fiction, narrative non-fiction | Familiar framework, pacing control, genre-flexible |
| The Hero's Journey Outline | High – 17 detailed stages with archetypes | Medium – requires understanding of psychology and mythology | Deep character transformation, emotional resonance | Fantasy, adventure, coming-of-age stories | Universal appeal, strong character motivation |
| The Snowflake Method Outline | High – iterative 10-step expansion | High – time-intensive, detailed planning | Thorough, complex plot and character development | Planners, complex/multi-layered narratives | Systematic, prevents writer's block, detailed |
| The Chapter-by-Chapter Synopsis | Moderate-High – detailed synopsis per chapter | Medium – time-consuming but structured | Consistent pacing, clear daily writing goals | Series, commercial fiction, multi-POV novels | Clear roadmap, pacing management, easy revision |
| The Mind Map Outline | Low-Moderate – non-linear, visual | Low – simple tools or software needed | Creative idea generation, visual story connections | Visual learners, complex thematic or plot relationships | Encourages creativity, flexible, reveals connections |
| The Seven-Point Story Structure | Moderate – 7 key points, ends-first | Low-Medium – requires pre-planning | Focused narrative with tight arcs | Short/long fiction, thrillers, YA, mysteries | Purposeful structure, ensures satisfying arcs |
Choosing Your Blueprint and Building Your Book
We've journeyed through a diverse landscape of outlining methods, from the classic Three-Act Structure to the organic Mind Map. Each framework offers a unique lens through which to view your narrative, providing a structural skeleton upon which you can layer the muscle of plot, the heart of character, and the soul of your theme. The core lesson is clear: an outline is not a cage, but a compass. It’s a strategic tool designed to guide you through the wilderness of your own creativity, ensuring you reach your destination without getting lost.
The true power of seeing a detailed example of a book outline is realizing its flexibility. The Hero’s Journey can be adapted for a modern corporate thriller, and the Snowflake Method’s fractal-like expansion is just as useful for a sprawling non-fiction guide as it is for an epic fantasy. Your task now is not to pick the "best" outline, but to identify the blueprint that best serves your story and your creative process.
Key Takeaways for Building Your Outline
Let's distill our exploration into actionable strategies. As you move from concept to manuscript, keep these critical insights at the forefront:
- Structure is About Pacing and Payoff: Whether you use the Seven-Point Story Structure or a detailed Chapter-by-Chapter Synopsis, the goal is the same. You are strategically placing plot points, reveals, and emotional climaxes to maximize reader engagement and deliver a satisfying conclusion.
- Characters Drive the Plot: Outlines are inert without compelling characters. Your protagonist’s desires, fears, and ultimate transformation should be the engine for every structural beat. A flat plot is often a symptom of a character who isn’t making meaningful choices.
- Flexibility is a Feature, Not a Flaw: No author sticks to their outline with 100% fidelity. Your best ideas will often emerge during the writing process. Treat your outline as a living document. Revisit it, revise it, and allow it to evolve alongside your story. Don’t be afraid to deviate when a character pulls you in an unexpected, but more interesting, direction.
Your Actionable Next Steps
Feeling inspired? Good. Now, it's time to translate that inspiration into action.
- Re-evaluate Your Project: Look at your story idea through the lens of two or three different outlines we've discussed. Does seeing it as a Three-Act Structure clarify your inciting incident? Does mapping it with the Hero's Journey reveal a missing "mentor" figure?
- Create a Hybrid Model: Don't be a purist. Take the elements you love from different methods. Perhaps you start with a Mind Map for brainstorming, then organize those ideas into a Seven-Point Structure, and finally flesh it out with a chapter-by-chapter plan. This customization is where you find a process that is uniquely yours.
- Start Small: If a full outline feels daunting, just map out your key turning points: the inciting incident, the midpoint reversal, and the final climax. Having these major pillars in place provides an immense sense of direction and makes the journey far less intimidating.
Mastering the art of the outline is one of the most significant steps you can take toward becoming a more confident, efficient, and effective writer. It transforms an overwhelming dream into a manageable, step-by-step project. This is how great books are built: not through a single flash of genius, but through deliberate architecture, thoughtful planning, and the courage to lay one brick at a time.
If you’re ready to turn your meticulously crafted outline into a professionally published book, the team at BarkerBooks is here to help. From editorial support that refines your structure to global distribution that brings your story to the world, we provide the comprehensive services you need to succeed. Visit us at BarkerBooks to see how we can help you build your legacy.