
So you want to write a book. That spark of an idea is the easy part; turning it into something people can actually hold and read is a whole different ballgame. It’s less about a single flash of genius and more about a structured, repeatable process.
Think of it as a journey with seven distinct phases: Ideation, Outlining, Drafting, Revising, Editing, Publishing, and Marketing. Getting a handle on these stages is what separates a great idea from a great book.
Your Path from Aspiring Writer to Published Author
Welcome to your no-nonsense guide to writing a book. We’re going to break down the entire process, from that first “what if?” moment to getting your finished work into the hands of readers. If you’ve ever felt overwhelmed by the sheer scale of the project, this roadmap is for you.
The good news? There’s never been a better time to be an author. The 2025 Indie Author Survey from Written Word Media found that a massive 96% of 1,346 authors they talked to are already published. Self-publishing isn’t a niche corner anymore—it accounts for over 30% of all ebooks on Amazon.
This isn’t just about writing; it’s about navigating a global market that’s projected to jump from $136.5 billion to $229.5 billion by 2035. Succeeding means understanding the process in a big way. You can dig deeper into these publishing industry trends on Spherical Insights’ blog.
At its core, the journey looks something like this:
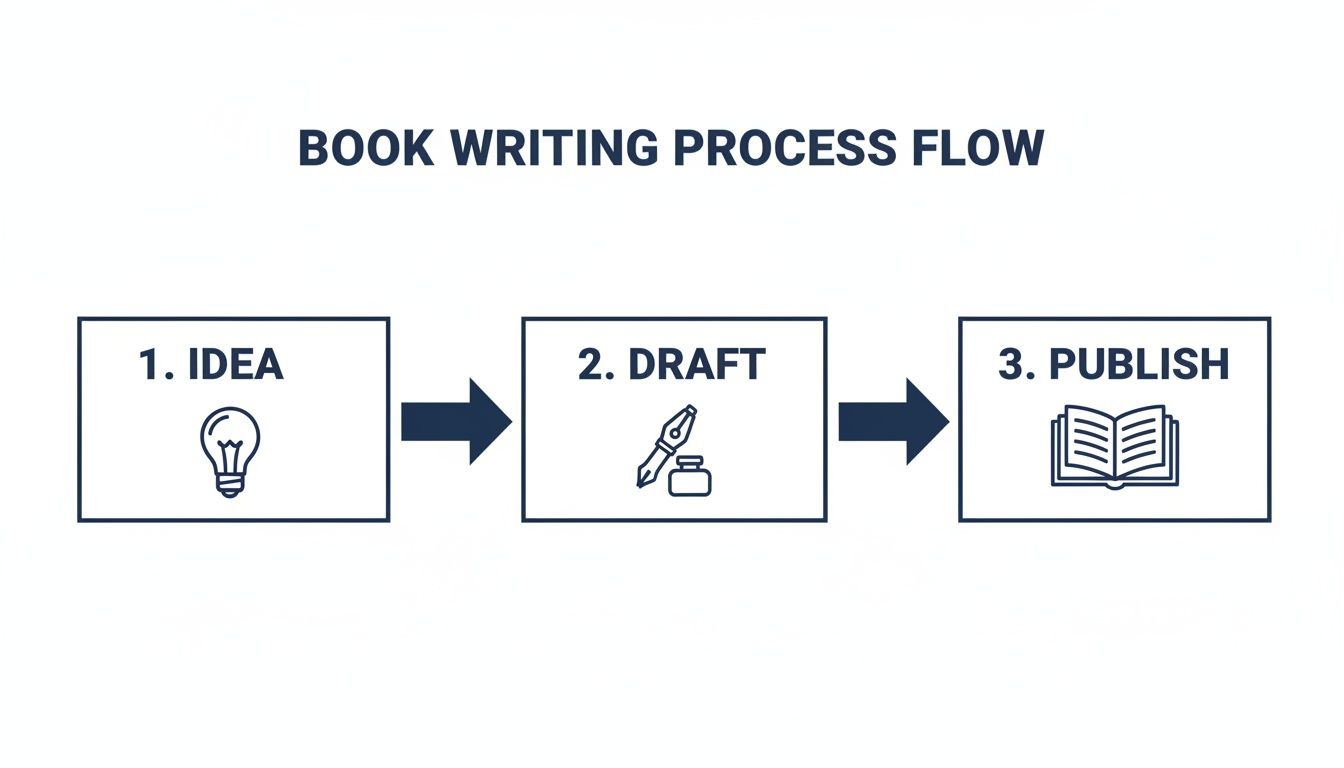
You start with the abstract idea, turn it into a concrete manuscript, and then get it ready for the world.
To give you a clear overview of the road ahead, here’s a breakdown of the entire lifecycle. Think of this as your high-level map for the entire project.
The Seven Phases of Writing and Publishing a Book
| Phase | Primary Goal | Key Activities |
|---|---|---|
| Ideation | Figure out if your idea has legs and who it’s for. | Brainstorming, market research, creating a reader persona. |
| Outlining | Build the skeleton of your book before you write. | Choosing a structure (e.g., Snowflake, three-act), chapter planning. |
| Drafting | Get the story down on paper without stopping to judge it. | Setting writing goals, building a consistent habit, focusing on forward progress. |
| Revising | Shape the raw draft into a coherent, compelling story. | Big-picture edits, fixing plot holes, deepening character arcs. |
| Editing | Polish the language until it shines. | Line editing for flow, copyediting for grammar, proofreading for typos. |
| Publishing | Turn your manuscript into a professional-quality book. | Interior formatting, cover design, getting an ISBN, copyright registration. |
| Marketing | Get your book in front of the people who will love it. | Building an author platform, running promotions, asking for reviews. |
Each phase has its own focus and set of challenges. By tackling them one at a time, you can take a process that feels monumental and make it entirely manageable. Let’s dive into the first phase: Ideation.
Building Your Foundation from Idea to Outline
Every great book starts with a flicker of an idea. But an idea alone isn’t enough—you need to know if it has legs. Before you dive into writing chapter one, the most important work happens: turning that raw concept into a solid, structured plan.
This early stage is all about validation. It’s easy to fall in love with our own ideas, but the real question is, will readers fall in love with them too? You don’t need a fancy market research firm to find out; all it takes is a bit of digital sleuthing.
Start where readers live. Spend an afternoon browsing Amazon or Goodreads in your genre. Look at the bestsellers, sure, but more importantly, look at the books with tons of passionate reviews. What are people talking about? What cover styles grab your attention? The goal isn’t to copy what’s popular, but to understand the conversation your book is about to join.
Define Your Ideal Reader
Once you’re confident people are hungry for your topic, it’s time to get personal. Who, exactly, are you writing for? I can’t stress this enough: creating a detailed reader persona will change how you write. It turns a vague broadcast into a direct, meaningful conversation.
Give this person a name, a job, a life. What are their biggest frustrations? What problems are they trying to solve by picking up a book like yours?
Let’s say you’re writing a non-fiction guide to financial independence for millennials. Your ideal reader might be “Alex, a 28-year-old graphic designer who dreams of traveling but feels totally stuck under a mountain of student debt. Alex needs a clear, no-fluff plan to build wealth without giving up their entire life.”
From this point on, every decision—from your tone of voice to the examples you use—should be made with Alex in mind. It’s a simple trick that makes your writing incredibly focused and effective.
Choosing Your Outlining Method
With a validated idea and a clear picture of your reader, you can start building your book’s skeleton: the outline. This is your roadmap. It’s the single best tool for preventing writer’s block and ensuring your final book makes sense from beginning to end.
There’s no magic formula here. When it comes to planning, you’ll find authors fall into different approaches like ‘plotters vs. pantsers’. The key is to find a method that clicks with how your brain works.
Some writers need a highly detailed, scene-by-scene blueprint, while others just need a few signposts to guide them. Here are a few battle-tested methods:
- The Three-Act Structure: A timeless classic for a reason. It divides your story into a clear beginning (Setup), middle (Confrontation), and end (Resolution). It’s a lifesaver for fiction and narrative non-fiction.
- The Snowflake Method: Perfect for those who like to build from the ground up. You start with a single sentence, expand it to a paragraph, flesh out your characters, and then build your scene list from that core.
- Mind Mapping: A fantastic visual tool. Put your main idea in the center and draw branches for chapters, sub-topics, and key takeaways. I find this especially helpful for non-fiction, where you’re trying to connect a web of related concepts.
An outline is not a cage; it is a key. It unlocks your story by giving you the freedom to write with confidence, knowing you are always heading in the right direction. It’s the architectural blueprint before you start laying bricks.
Outlining Fiction vs Non-Fiction
Your approach to outlining will look very different depending on whether you’re telling a story or teaching a concept. Let’s look at two quick examples.
Scenario 1: The Non-Fiction Business Book
Imagine an author writing a guide on project management for small business owners. The outline is all about logic and solving a problem.
- Introduction: Hook the reader by describing the chaos of mismanaged projects and promise a clear path forward.
- Part 1: The Foundations: Explain core principles (e.g., Agile vs. Waterfall).
- Part 2: The Toolkit: Dedicate chapters to specific, practical tools (like Trello or Asana).
- Part 3: Putting It to Work: Walk through case studies and provide a step-by-step implementation plan.
- Conclusion: Briefly summarize the key lessons and provide a list of extra resources.
Scenario 2: The Fiction Thriller Novel
Now, let’s picture a novelist plotting a thriller. Here, the outline is driven by suspense, plot twists, and character arcs.
- Act I: Introduce the hero and their ordinary world, then shatter it with an inciting incident that kicks off the story.
- Act II: The hero scrambles to react. The stakes get higher, they chase down false leads, and a massive midpoint twist completely changes the game.
- Act III: It’s a nail-biting race to the climax, the final showdown with the villain, and a satisfying resolution that ties up the central plot.
No matter what you’re writing, a solid outline gives you clarity and keeps the momentum going. If you want to go even deeper, the team at BarkerBooks has put together a complete guide on https://barkerbooks.com/how-to-write-a-book-outline/ that explores these methods in much more detail.
Writing Your First Draft Without the Stress
You’ve got your outline, your trusty map for the journey ahead. Now comes the part everyone romanticizes and, let’s be honest, secretly fears: writing the actual book. That blinking cursor on a blank page can feel intimidating, but it doesn’t have to be.
The goal right now is beautifully simple: get the words down.

This first pass is often called a “fast draft” or, my personal favorite, a “discovery draft.” Its only job is to exist. It’s going to be messy. It will have clunky sentences and paragraphs you’ll look back on and wonder what you were thinking. That’s not just okay—it’s the whole point.
Embrace the “Ugly” First Draft
The philosophy here is built on a single, powerful principle: forward momentum is everything. You absolutely must fight the urge to edit while you write. We’ve all fallen into the trap of rewriting an opening paragraph a dozen times, and all it does is kill your motivation and bring your progress to a screeching halt.
Think of it like this: you’re a sculptor who’s just been handed a giant block of marble. You can’t start refining a perfectly sculpted nose until you’ve first chiseled out the rough shape of a head. Your first draft is about getting that basic form down.
Here’s how to make that happen:
- Silence Your Inner Editor: That little voice telling you a sentence is weak? Acknowledge it, thank it for the feedback, and tell it you’ll deal with it later. The editing stage is its time to shine, not now.
- Use Placeholders Liberally: Can’t find the perfect word? Need to look up a historical fact? Don’t stop writing. Just type “[INSERT BETTER ADJECTIVE]” or “[CHECK DATE OF THIS BATTLE]” and keep the words flowing.
- Write Out of Order: Feeling stuck on Chapter 5 but have a crystal-clear vision of the big showdown in Chapter 20? Jump ahead! Write the scenes that are calling to you. Your outline will be there to help you stitch it all together later.
This isn’t about being lazy; it’s about being strategic. By separating the creative, messy act of drafting from the analytical, precise act of editing, you make both processes far more effective.
Build a Writing Routine You Can Actually Stick To
When it comes to finishing a book, consistency beats intensity every single time. This is a marathon, not a sprint. The trick is to build a habit that fits into your real life, not some idealized fantasy of what a writer’s life looks like.
Forget the pressure of massive word counts. Aiming for 5,000 words a day is a fantastic way to burn out. A much more sustainable goal is 300-500 words per day. That’s often less than a single page, but over three months, it adds up to a 45,000-word novella.
Your goal isn’t to write a book. It’s to write for 30 minutes today. It’s to hit 400 words this morning. By breaking the monumental into the manageable, you make consistent progress not just possible, but inevitable.
One of the best tools I’ve found for this is the Pomodoro Technique. It’s incredibly simple: you write in focused 25-minute bursts, separated by 5-minute breaks. It’s a psychological trick that makes staring down a big project feel easy while also preventing you from getting mentally fried.
Finding Your Voice and Bringing Characters to Life
As you get words on the page, something magical happens: your unique authorial voice starts to emerge. This is the personality that makes your writing sound like you. Don’t try to force it. Just let it develop naturally through your word choices, sentence rhythms, and the overall tone you create.
But the real heart of your story will always be your characters. They’re the engine that drives the entire plot. To make them feel like real, breathing people, you need to understand what makes them tick. What does your protagonist want more than anything in the world? And what are they absolutely terrified of losing? The tension between those two things is where all great drama comes from.
Dialogue is one of your most powerful tools for character revelation. Real people rarely say exactly what they mean. Use subtext. What a character doesn’t say is often far more revealing than what they do.
Of course, even with the best strategies, some days the words just won’t come. We all hit that wall. If you find yourself stuck, our guide on overcoming writer’s block is packed with practical tips to get you moving again. Winning this mental game is a huge part of learning how to write books.
How to Revise and Edit Your Manuscript
You did it. You finished the first draft. That’s a huge milestone, so take a moment to celebrate. It might be messy, a bit sprawling, and full of rough spots, but it’s done. You have the raw clay. Now comes the sculpting. This is where the real craft of writing takes over, transforming that raw material into a sharp, compelling, and professional book.

The first thing you need to do feels completely wrong, but it’s critical: put the manuscript away. Seriously. Stick it in a drawer for at least two weeks, maybe even a full month. This break creates the distance you desperately need to see your work with fresh eyes. When you come back, you’ll be shocked at the plot holes, awkward phrases, and structural problems you were totally blind to before.
When you do pick it up again, remember you aren’t just “fixing typos.” Revision is a multi-layered process, and trying to do everything at once is a classic rookie mistake that leads to burnout. The trick is to break it down into three distinct stages.
The Three Layers of Editing
Think of editing like looking at your manuscript through different camera lenses, starting with a wide-angle shot and slowly zooming in for the close-ups. Each pass has a specific mission.
Developmental Editing (The Big Picture): This is your first and most important pass. You’re the architect here, checking the foundation of the whole project. Ignore grammar and spelling completely. Instead, focus on the big stuff: plot, pacing, character arcs, and overall structure. Is the ending satisfying? Does the middle drag? Are your characters’ motivations actually believable? This is where you might have to make big, sometimes painful, changes like cutting chapters or rewriting the ending.
Line Editing (The Writing Style): Once the structure is solid, you can zoom in to the sentence level. This is all about refining your voice and the flow of your prose. You’ll hunt for repetitive sentence structures, clichés, weak verbs, and clunky dialogue. The goal is to make every single sentence clear, purposeful, and a pleasure to read.
Copyediting (The Mechanics): Finally, you bring out the magnifying glass for the final polish. Now you’re a detective, hunting for errors in grammar, spelling, punctuation, and consistency (did you spell a character’s name two different ways?). It’s meticulous work, but it’s what makes your manuscript look and feel professional.
Your Self-Revision Checklist
Before you even think about showing your work to anyone else, you need to do a thorough self-revision. Use this as a guide for your first (developmental) pass to catch the most common problems.
For Fiction Writers
- Plot & Pacing: Does your story grab the reader from the first page? Be honest—are there any boring sections where the pace just dies?
- Character Arcs: Does your main character actually change or grow by the end? Or are they the same person they were on page one?
- Stakes: Is it crystal clear what your protagonist stands to lose? If the stakes aren’t high enough, the reader won’t care.
- Show, Don’t Tell: Are you telling us a character is angry, or are you showing us through their clenched fists and clipped sentences? Find every instance of “telling” and transform it into “showing.”
For Non-Fiction Writers
- Central Argument: Could a reader easily tell someone what your book’s core message is? Is it consistent from start to finish?
- Structure & Flow: Do the chapters build on each other in a logical way? Or does it feel like a random collection of essays?
- Clarity & Tone: Are you using jargon your target reader won’t understand? Is your tone authoritative without being condescending?
- Examples & Evidence: Have you backed up your claims with compelling stories, data, or real-world examples?
Revision isn’t about fixing what’s wrong; it’s about discovering what the story is trying to be. It’s a process of listening to your own work and helping it reach its full potential.
When to Hire a Professional Editor
Self-editing will take you a long way, but every author—even the most experienced ones—needs a professional editor. You’re just too close to your own work to be truly objective.
A great editor is more than a grammar-checker. They are your first critical reader, a fresh pair of expert eyes, and a strategic partner in making your book the best it can be.
This isn’t just an expense; it’s an investment. The numbers don’t lie. Authors who invest in professional editing and design consistently see 50-100% higher sales. In a global book market that’s projected to hit $142.72 billion in 2025, professional polish is what separates a hobby project from a successful launch. You can dig into more of these fascinating book sales statistics on Newprint’s blog.
At BarkerBooks, our team lives and breathes this stuff. We have editors who specialize in every stage, from the big-picture developmental deep-dives to the final, meticulous proofread. We’re here to help you transform your manuscript from good to truly exceptional, making sure it’s ready to find its audience.
So, you’ve done it. The endless rounds of revising and editing are behind you, and your manuscript is finally sharp, clean, and ready for the world. But you’re not at the finish line just yet. Now comes the exciting part: turning that polished Word document into a professional, market-ready book.
This is where the magic happens, transforming your text into a product that can stand proudly next to anything from a major publishing house. It’s a final, crucial phase that many new authors overlook.
Getting your book ready for publication involves a mix of creative and technical skill. We’re talking about everything from interior formatting and cover design to securing an ISBN and registering your copyright. Each piece is a critical part of the puzzle, and skipping over them is one of the quickest ways to sabotage your own launch.
Why Professional Interior Formatting Is Non-Negotiable
How the words look on the page is almost as important as the words themselves. It directly shapes the reader’s experience. Professional interior formatting isn’t just about picking a nice font; it’s the subtle art of typography and layout design. A beautifully formatted book just feels right—it’s easy to read, with consistent headings, proper margins, and text that invites you in instead of straining your eyes.
This process is completely different for print books versus ebooks.
- For Print Books: You’re working with a fixed layout. This is often done in a program like Adobe InDesign and means making careful decisions about trim size, margins (especially the inside “gutter” where the pages are bound), and font selection. The goal is to create a physical object that’s a pleasure to hold and read.
- For Ebooks: You need a “reflowable” layout. The text has to adapt to countless screen sizes and user settings, like when a reader increases the font size. This usually means creating a clean EPUB file that works seamlessly on any device, from a Kindle to a Nook.
For a lot of writers, this technical side of things can feel pretty overwhelming. If you want to dive deeper into the nitty-gritty, check out our complete guide on how to format a book for publication. Or, you can let the design team at BarkerBooks handle it all for you, ensuring a perfect reading experience on every platform.
Your Cover Is Your #1 Marketing Asset
I can’t say this enough: never, ever skimp on your book cover. In a sea of online options, your cover is the first—and sometimes only—thing that will make a reader stop scrolling. It’s not just a pretty picture; it’s a powerful marketing tool that instantly communicates your book’s genre, tone, and quality.
A professional cover designer is a specialist in visual storytelling. They know exactly which fonts, colors, and imagery will catch the eye of a thriller fan versus a historical romance reader. A DIY cover, on the other hand, often looks amateurish and can be a major red flag for potential buyers, making them assume the writing inside is just as unprofessional.
A great book cover makes a promise. It promises a gripping mystery, a life-changing lesson, or a heart-melting romance. A professional design makes sure that promise is irresistible.
The Nuts and Bolts: ISBN, Copyright, and More
Before you can hit “publish,” there are a few administrative tasks you have to tick off the list. Think of these as the official paperwork that legitimizes your book and gets it ready for sale.
1. Get Your ISBN: The International Standard Book Number (ISBN) is a unique 13-digit code that identifies your book. You’ll need a different one for each format—ebook, paperback, hardcover, etc. While some platforms like Amazon offer a free one, buying your own ISBN makes you the official publisher, giving you much more control over your book’s future.
2. Register Your Copyright: In the U.S., your work is technically copyrighted the moment you write it down. But formally registering it with the U.S. Copyright Office creates a public record of your ownership. This is a must-do step if you ever need to take legal action to protect your work from infringement.
3. Write a Killer Book Description: This is your sales pitch, often called the “blurb.” A fantastic description hooks the reader from the first sentence, sets up the central conflict or promise of the book, and leaves them desperate to know what happens next.
4. Craft a Compelling Author Bio: Your bio is where readers get to connect with you. Keep it brief, highlight your expertise or personal connection to your book’s topic, and always include a link to your website or social media.
These steps aren’t optional if you want a professional launch. With over 1.5 million books uploaded to Amazon KDP every year, every single detail matters. The data shows that professionally produced books sell 2-3 times more copies on average. In fact, 70% of indie authors who invest in these final steps recoup their costs within the first year. It’s not an expense; it’s an investment in your success.
Launching and Marketing Your New Book
Your book is finally polished and ready to go. Now comes the exhilarating part: getting it into the hands of actual readers. This is where distribution and marketing take over, becoming the two engines that will propel your work out into the world. Honestly, figuring this part out is just as important as the writing itself.

First up, you have a big decision to make about where your book will be sold. You can go “exclusive” with a single retailer, like Amazon’s KDP Select program, or you can go “wide” and make your book available on as many platforms as possible—think Barnes & Noble, Apple Books, Kobo, and others.
Going exclusive can sometimes mean better royalty rates and access to special promotional tools. On the other hand, going wide builds a much broader readership and means you aren’t putting all your eggs in one basket. There’s no right or wrong answer here; it all boils down to your long-term goals as an author.
Build Your Author Platform Before You Need It
Here’s a piece of advice I give every writer: marketing isn’t something you bolt on at the end. It’s a foundation you start laying long before your book ever sees the light of day. Your author platform is simply your connection to readers. It doesn’t have to be some massive, complicated thing.
Start with just these two assets:
- A Simple Website or Landing Page: Think of this as your online home base. It needs your book cover, the blurb, a short author bio, and a super obvious way for people to either buy the book or sign up for your email list.
- One or Two Social Media Profiles: Don’t spread yourself thin trying to be everywhere at once. Pick the one or two platforms where your ideal readers hang out. Is it Instagram for a visually driven genre? TikTok for punchy, short-form video? LinkedIn for a business book? Focus your energy there.
The goal is to gather a small but mighty following of people who are genuinely excited about your work. This gives you an audience that’s ready and waiting to support you from day one. To give your book a real promotional push, it’s also a great idea to learn how to create video ads that drive growth and connect with your target readers.
Your author platform is your direct line to your readers. It’s the difference between launching your book to the sound of crickets and launching it to an audience that’s been waiting to hear from you.
Your Book Launch Checklist
A great launch isn’t just a single event; it’s a series of coordinated moves. Having a simple checklist can be a lifesaver during the chaos of launch week, making sure you hit all the most important notes.
Essential Launch Tasks:
- Gather Early Reviews: Get Advance Reader Copies (ARCs) out to your “street team” or beta readers several weeks before launch. Having even a few honest reviews on your book’s page on day one makes a huge difference in visibility and credibility.
- Plan a Price Promotion: Think about launching your ebook at a deep discount, maybe $0.99, for the first few days. This tactic encourages impulse buys and can help your book climb the sales charts, which in turn makes the platform’s algorithms show it to more people.
- Experiment with Ads: Platforms like Amazon Ads let you target readers who have bought books very similar to yours. You can start with a small daily budget just to see what resonates. It’s one of the most direct ways to find your first wave of new readers.
Launching a book is a marathon, not a sprint. The team at BarkerBooks can guide you through this entire process, from setting up your global distribution channels to running targeted marketing campaigns. We’re here to make sure your book doesn’t just get published—it gets discovered.
Got Questions About Writing a Book? We’ve Got Answers.
Stepping into the world of writing and publishing for the first time can feel a bit like learning a new language. As you start this incredible journey, a few key questions are bound to pop up. Let’s tackle some of the most common ones we hear from authors just getting started.
Think of this as a quick-start guide to help you set the right expectations from day one.
How Long Does It Really Take to Write a Book?
This is the big one, isn’t it? While there’s no single magic number, we can definitely give you a solid framework. For a typical book (60,000 to 90,000 words), most authors find it takes anywhere from 6 to 12 months just to get that first draft down on paper.
But the writing is only the beginning. You’ll want to carve out another 3 to 6 months for the essential next steps: revising, getting it professionally edited, and preparing it for publication. Remember, consistent effort beats frantic sprints every time.
Do I Absolutely Need a Literary Agent?
That really hinges on what you want to achieve. If your dream is to land a contract with a “Big Five” traditional publisher, then yes, an agent is your non-negotiable ticket into that world. They’re the gatekeepers.
However, that’s not the only path anymore—not by a long shot. Self-publishing gives you a direct line to readers, total creative say, and much better royalty rates. You can get your book professionally published and sold across the globe without ever querying an agent.
The real question isn’t if you need an agent, but which publishing path is the right fit for your book and your goals.
What’s the Real Cost of Professional Self-Publishing?
Investing in your book’s quality is a direct investment in its potential for success. The costs can vary quite a bit, from a few hundred dollars to several thousand, all depending on the level of professional help you bring in.
If you’re going to spend money anywhere, focus on these three game-changers:
- Professional Editing: This is what turns a good manuscript into a great one. It ensures your story is polished, clear, and powerful.
- Custom Cover Design: Your cover is your book’s #1 marketing asset. It has to grab attention in a split second.
- Interior Formatting: A clean, professional layout makes for a smooth and enjoyable reading experience. Don’t skip this.
Marketing is another variable to consider. Often, you can find service packages that bundle these essentials, making it a more manageable investment for new authors.
Ready to turn your manuscript into a book you can be proud of? The expert team at BarkerBooks is here to help with everything from editing and design to global distribution and marketing. We help you bring your vision to life. Learn more and get started with BarkerBooks.